Friday 31 May 2013

Some New Fun For Me! LiaStampz Challenge #42 - Add a Flower

Happy Friday, my friends!
Today is a scheduled post because I'm very busy with all the last minute details for the wedding! Tomorrow is the BIG DAY! The festivities, and time with family, will continue for a few days afterwards so you may not be hearing from me for a little while!
I am very excited about today's post! A little while ago, while doing some digi shopping over at Whimsy Stamps, I discovered some fabulous images by LiaStampz. Some of them are so fun they made me laugh right out loud...and you know how much I like that! :o) So fast forward a little bit and I was invited to join the Design Team! Of course I said YES!! I'm excited about sharing some of their sweet images with you! All the links to Lia Stampz and the other DT members have been added in my sidebar, so please check them out!
Over on the LiaStampz blog there are some great challenges going on...twice a month! You can read the Challenge Rules HERE. You don't have to use a Lia Stampz image but if you do you can enter the challenge twice. You have the chance to win a prize or be the Spotlight Artist!  I'd love to see some of you join in the fun!
This Challenge #42 is "Add a Flower". How easy is that? We all love to add flowers to our projects, don't we? For my card I used the image called Lily and you can find it in the Whimsy store right HERE. Isn't she cute? She totally reminded me of Pippi Longstocking so I just had to color her hair red! The flowers are all cut with my wonderful new Cricut Expression 2! I'm really liking that fun machine!
Okay...must run! Please go check out the fun challenge and all the wonderful images! Have a beautiful weekend! :o)


Materials Used:
Papers: Fancy Pants - My Family
Image: LiaStampz - Lily found HERE;
Prismacolor Pencils and OMS;
Flowers: Cricut Cartridge - Flower Shoppe;
Punches: Stampin' Up - 7/8" Scallop Circle,
Fiskars - 1" Circle, Martha Stewart - Branch and Rose Leaf;
Stamp: Stampin' Up - A Round Array;
Ink: Distress Ink - Vintage Photo, CTMH - Cranberry
Ribbon: Offray;
Brads: My Stash.

* * * * *


Wednesday 29 May 2013

Moment by Moment Wedding Mini - Creative Inspirations #5

Hello, my friends!
You probably have been wondering why I haven't been posting anything wedding related, right? I've been too busy with DT work and wedding projects to do that! lol However, today I am combining my DT project for Creative Inspirations with a wedding mini.Usually when I make a mini album I just play with products that I love! This mini album is a little bit different. I put quite a bit of thought into what I will actually be putting in it! This album is for me to fill with some of my favorite photos from my daughter's wedding. I really like the elegant vintage style. My daughter's tastes run more toward bright colors and retro style, so this one is just for me!
When I had the flu recently I spent a little bit of time going through my favorites on YouTube. This mini album was inspired by this video HERE. These Imaginisce Now and Forever papers from the Creative Inspirations shop were just perfect for this project. I combined them with two different shades of kraft cardstock. The album measures 5" X 7" and it will actually hold a total of 36 photos that measure 4" X 6". Or I can put in less photos and do lots of journaling. As with all my mini album posts, I have quite a few photos to share. Let's begin!
Here is the front cover:

Everything is edged with either Vintage Photo Distress Ink or Tarnished Brass Distress Stain. 
That stain is my new favorite - hand's down! I embossed the spine paper and ran more stain over it.
I made all the flowers and sprayed them with Perfect Pearl Mist in Biscotti. 
I then added a few little ribbon roses and punched leaves.

Another view of the entire cover:

The "moment by moment" tag is part of the Now & Forever collection.


 Here is a close-up of the spine embellishment:

I wrapped crinkled ribbon right around the spine of the book and tied it in a bow.
 I then added another crinkled ribbon double bow on top of it. 
I added several Tim Holtz Baubles to a Trinket Pin that says "TREASURE" and pinned it onto the bow.

Here you can see the six pages:

This album is a pocket page design with a total of six pocket pages. 
Each pocket holds two tags that have been cut with two different Tim Holtz On the Edge Dies. 
The Vintage Doily cut tag is folded over the pocket page and embellished with lace and a flower.
The back tag is cut longer so that the decorative edge sticks out.
Again, everything has been edged with that beautiful metallic stain.

This is the inside front cover and the first page:

On the left is a strip of lace that holds some tags that were made from the sticker collection.
On the right is the Hanging Sign. It's the perfect place for the wedding information.
The sign is loose so a photo can go behind it if I want.


All the elements on the inside pages are adhered only on the edge so that a full-size photo will fit behind.
One the left is the "time to get ready" page. 
We're all going to the salon together in the morning and the photographer will be there to capture the fun!
On the right will be my daughter in her wedding dress!


These two pages are for the ceremony. 
I'm noticing that the right and left pages look like different colors on these 2-page photos. 
They are actually identical but it was very dreary weather when I took these photos.
Pretend you don't notice that! ;o)


The married couple will be driven around in a very cool vintage muscle car...not an old jalopy! lol
These pages will be for photos of them leaving after the ceremony!


On these pages I've added some embossed chipboard dies that I cut using a variety of Movers and Shapers.
On the left is the Lock and Key with a Muse Token that says "FOREVERMORE".
On the right is the Postage Stamp and some Mini Tickets.
All these elements were added using my paper tagger through an eyelet.


These two pages are for FAMILY photos.

 Last page and inside back cover:

On the left is a piece of embossed chipboard flourish with a flower. 
On the right is the rest of the embossed flourish with a tag made from one of the stickers. 
There is room for journaling on the back.

The two tags that fit in each pocket:

I stamped all of the tags exactly the same way. There are six of each tag.

One final photo:

This photo shows you the completed mini album from the page side.

So there it is! I really had fun making this one...although it did take me forever! I had to keep leaving it to take care of other things. This is a design that I will be using again and again! The way it's constructed it has room for all the embellishments and photos without over extending the cover. It will continue to lie flat and I really like that! 
I did list many of the materials that I used throughout my description. Most of the item used in this project can be found at the Creative Inspirations Design Team post. If you have any questions about anything...please ask!
Thanks so much for stopping by! I hope you come back on Friday for my next post...I'm quite excited about it! Now I must get back to work! Happy days to you all! :o)

* * * * *

Thursday 23 May 2013

Sushi Doll #10 - Betty

Good morning, my friends!
I'm back today to introduce you to Betty! She is my latest Sushi Doll project. She is so sweet, and lots of fun to play with! The banner she's holding actually comes empty, so there are limitless options. I needed to make a thank-you card so I added the "thanks" and then just used a little heart for the "you". There is a bracelet on her wrist that I covered up with the little pearls. So head on over to Susi's shop and take a peek at the wonderful images available!
Wow...no rambling from me today! lol I'll be busy finishing up my mini-album and I hope to be back soon to share it with you! Happy day! :o)


Look...I even made a box envelope for this 6" square card. That never happens, so I took a photo:


Materials Used:
Papers: Studio Calico - Take Note, Recollectons Cardstock;
Dies: Sizzix Framelits - Label, Ornat #2, Memory Box - Cherry Blossom, 
Spellbinders Borderabilities - Fleur De Lis Border; 
Spellbinders Shapeabilities - Page Maps - Pot Pourri;
Punch: Fiskars Corner Punch, Martha Stewart - Branch;
Prismacolor Pencils and OMS;
Ink: Distress Ink - Vintage Photo;
Stamp: Studio G - Alphabet Stamp;
Ribbon: Offray;
Bling: Stampin' Up - Basic Pearls.

* * * * *

Linking Up To:


* * * * *

Monday 20 May 2013

A DIE FOR A SKETCH - CHALLENGE #12 - BIRTHDAY CELEBRATION REMINDER

Hello, everyone!
Thanks so much for stopping in again! A big thank you for all the get well wishes too! I really appreciate your sweet words of encouragement! :o)
I'm here today to remind you about the fabulous birthday celebration going on over at A DIE FOR A SKETCH this month! The blog hop is over but there are still lots of prizes up for grabs. You can see the list and all the other Design Team projects HERE. All you have to do is create a project using this great sketch and at least one diecut:


Last time my project used an image from the sponsor Milk Coffee Digi Stamps. You can see that post HERE
This time I used an image from the sponsor StampArt Design by Kathryne. I'm very happy that I got this card done before Mr Flu came to visit! This image is called "Katie" and I think she is just the sweetest thing! The sentiment is also by Kathryne and was a freebie from her "Talk About Tuesday" post. You all really need to head over to Kathryne's blog and subscribe so you can receive the wonderful freebies that she shares every week!


Materials Used:
Papers: Prima- Sun Kiss, Momenta Cardstock;
Prismacolor Pencils and OMS;
Dies: Spellbinders Nestabilities - Standard Circles (LG),
Spellbinders Just Rite Custom Dies;
Pearls: Stampin' Up;
Ink: Distress Ink - Vintage Photo;
Doily: My Stash.

* * * * *
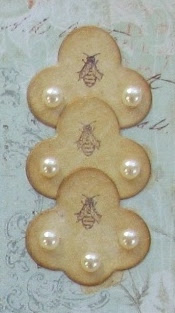
Here's a close-up of my corner embellishments. One of the papers had these tiny little bees all over it. I used a die and strategically placed it over the bee...six times...then added some pearls.


* * * * *
Please pop on over to A DIE FOR A SKETCH and check out all the details. Then get to work on your project! Maybe you'll win one of the great prizes! 
There is also a Design Team call going on. All the details can be found HERE!
Thanks very much! :o)


Thursday 16 May 2013

Hymn and Scripture Challenge #7 - Trust Him When Thy Wants Are Many

Hello, my friends!
It's been quite a week around here! My poor husband and I have both been suffering with the worst flu bug EVER! This was absolutely NOT in my schedule! lol At least it's not the week before the wedding, right? :o)
I am so sorry that I haven't been up to visiting any of you but I hope to jump back into blog land soon! I also hope to get back to work on my next Creative Inspirations DT project. Yes, it's another mini album...how did you guess! lol
I was finally up to doing something creative today, so I jumped (no actual jumping) right in with my overdue page for the Hymn and Scripture Challenge. It's something a bit different for me but I hope you enjoy it. I saw a similar  technique on youtube and just had to try it. I used an assortment of chipboard letters from my stash and laid out my title on white cardstock. Then I used a few mists and randomly sprayed over-top of them. After drying with my heat tool I removed the letters. Then I used a variety of stamps and inks and just kept layering. I hand-wrote the rest of the words for the title, matted them, and popped them up on dimensionals. Then I did the same with the Scripture verses. I added some layered butterflies and adhered them. I didn't bother to add any bling because there is such shimmer to the entire page!


Perhaps you can see some of the shimmer in this photo:

Materials Used:
Papers: Textured Cardstock, Prima Ledger Paper;
Inks: CTMH - Ponderosa Pine, Moonstruck, Smokey Plum,
Stampin' Up - Black, Regal Rose;
Stamps: Simon Says Stamp - Music 2 My Ears,
Stampin' Up - Music Note Wheel;
Dies: Spellbinders Nestabilities - Standard Circles (LG),
Classic Scalloped Circles (LG);
Punch: EK Success - Triple Butterfly Punch;
Sprays: Perfect Pearls - interference red, turquoise,
Shimmer Mist - Purple

* * * * *

Well, this is a hymn that I am not at all familiar with. In fact, I couldn't find it in any of the hymnals or websites I searched. So I have no sheet music for this one...or even a video to share. I must tell you that I will now add this hymn to my "favorites" list based on the words alone! They are absolutely wonderful! I have hand-written all the verses and added it to the back of my page. I know that the colors do not match the front of the page at all but I wanted to use this particular ledger paper because I really needed the lines today! lol I'm sure I've mentioned it before but I always like to hand-write the things that are important to remember. The words of this song are SO important to remember! Please read them:


One more Scripture verse I would like to share with you is found in Philippians 4:19, it says:

"And my God will meet all your needs according to the riches of  His glory in Christ Jesus."

I actually have a note in my Bible regarding Philippians 4:10-19 that is dated August 1984. It states that the promise found in this passage is like receiving a blank cheque signed by God Himself. Why do we waste so much time and energy on worries and doubts? God's provisions are ALWAYS greater then our problems!


Much JOY and LAUGHTER to you ALL! :o)

* * * * *
Linking Up To:


* * * * *

Thursday 9 May 2013

Sushi Dolls #9 - Sushi Picture

Hello, my dear friends!

So much happening around here lately! The wedding is coming up FAST and I'm working on a number of different projects. Lots to do...and I haven't even found my shoes yet! lol I'm also trying to work ahead on some of my Design Team projects so that I won't have that last minute crunch time right before the wedding.

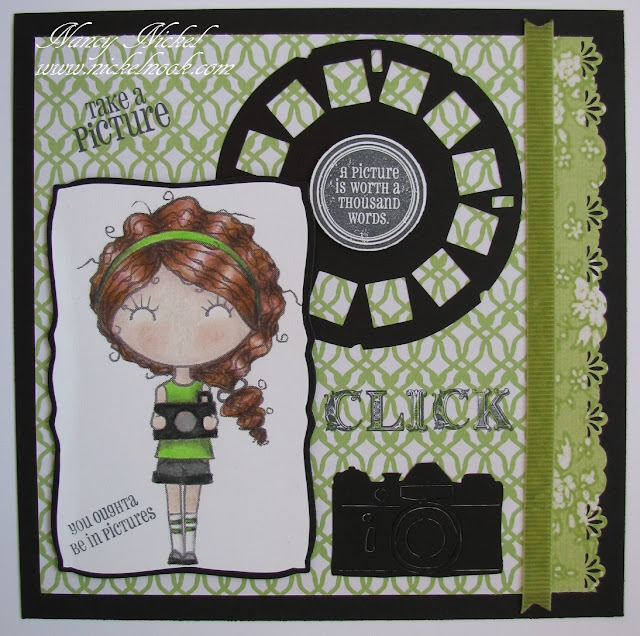
Today I have another Sushi Dolls project for you. This image is called Sushi Picture and is from one of the earlier releases. I've used this great image on what will be the first page in a new 8 X 8 album that I'm working on. I thought it worked so well in combination with the dies and stamps! 

I guess that's about it! I hope to be back soon with more! Happy days to all of you! :o)


Materials Used:
Papers: GCD Studios - Melody Ross Soul Food
Image: Sushi Dolls - Sushi Picture;
Prismacolor Pencils and OMS;
Dies: Spellbinders Nestabilities - Curved Rectangles,
Tim Holtz Alterations - Picture Wheel, Base Tray,
Camera -Movers & Shapers;
Punch: Fiskars Border Punch;
Stamps: Close To My Heart - Take a Picture;
Ink: Memento - Tuxedo Black;
Ribbon: Making Memories - Passport;
Glossy Accents.

* * * * *
So pop on over to the Sushi Store HERE and take a look at all the fabulous images!

Sunday 5 May 2013

A DIE FOR A SKETCH - BIRTHDAY CELEBRATION - Challenge #12


Welcome to our Birthday Celebration!
A Die For A Sketch Challenge Blog is 1 year old and we are celebrating in style!

We have 5 sponsors, 3 new Design Team Members, and 7 Special Guest Designers for you this month PLUS a BLOG HOP!!  and  PRIZES!!

 DESIGN TEAM CALL!!!
 If you would like to be considered for our Design Team position, please put DT next to your name with your card when you enter it into the link tool.

 ♡  ♡  ♡  ♡  ♡  ♡ 

Here is our Fabulous Sketch for our Birthday Celebration

All of our sketches are made by our Blog owner Dunja
*Remember to follow the sketch and to use a minimum of 1 die on your creation*
*All your Challenge entries are to be entered in the last linky tool*

* * * * *

Here is my card using Tiffany Fairy from our sponsor Milk Coffee:


Materials Used:
Image: Milk Coffee - Tiffany Fairy;
Prismacolor Pencils and OMS;
Papers: Prima - Sparkling Spring;
Stamps: Whimsy Stamps - Friendship Notables 2;
Ink: Distress Ink - Vintage Photo, Martha Stewart - Bamboo;
Markers: American Craft Stamp Marker - Black;
Glitter: Stickles - Diamond;
Pearls: Stampin' Up;
Ribbon: Offray;
Dies: Spellbinders Nestabilities - Standard Circles (LG),
Spellbinderst Nestabilities - Classic Scalloped Circles (LG),
Stampin' Up Embosslits - Beautiful Wings;


* * * * *

Look at the awesome prizes from our Sponsors


10 € Gift Voucher


StampArt Design by Kathryne is offering 5 Digital Images


Milk Coffee is offering 3 Digital Images


* * * * *


A Die For A Sketch Birthday Blog Hop 
Please leave a comment when you visit their blogs

First STOP: DT Dunja
Special Guest Alberto    
NEW DT Fleur
Special Guest Alison
Special Guest Joann 
Special Guest Vicky B. 
Special Guest Ruby
Special Guest Teresa 


Final stop is   

* * * * *
Be sure and stop by everyone's blogs and leave a comment.
The blog hop will end on May 19, 2013.
There are some prizes to win along the way as well as a generous prize from:
  
10 € Gift Voucher


A special Thank you
We would love to thank you all for entering our challenges every month as we enjoy your amazing creations and getting to know you on your blogs. It would not be the same without you!!  Wish you all luck in winning the many prizes our sponsors are offering for our birthday celebration!
Thank you for celebrating with us!!
♡  ♡  Hugs from♡  ♡   
A Die For A Sketch Design Team

Blog Archive